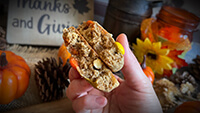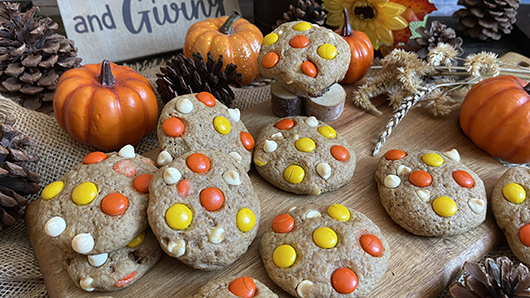
Reese's Pieces Pumpkin Peanut Butter White Chocolate Chip Cookies
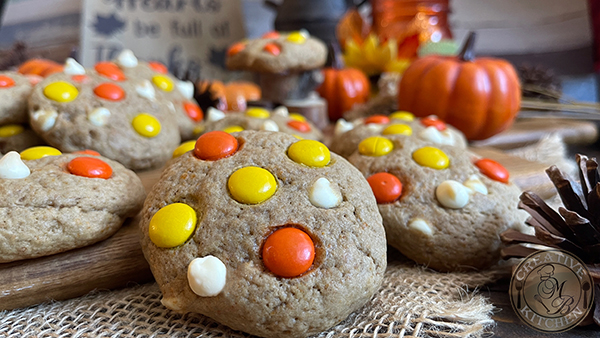
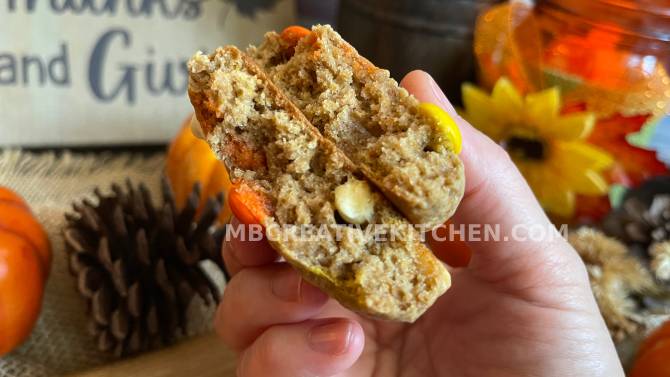
Reese's Pieces Pumpkin Peanut Butter White Chocolate Chip Cookies offer a delightful twist on classic flavors. These cookies are soft and chewy on the inside, with a crisp outside. With a subtle blend of pumpkin puree and peanut butter, they strike the perfect balance without being overwhelming. The addition of Reese's chocolate and creamy white chocolate chips creates a deliciously unique treat that's perfect for any occasion. Enjoy a sweet harmony of Reese's, pumpkin, and white chocolate in every bite!
Ingredients:
- 1 cup + ⅔ Cup All Purpose Flour
- 1 Teaspoon Unsweetened Cocoa Powder
- ¼ Cup Granulated White Sugar
- ½ Cup Light Brown Sugar (Fully packed)
- ¼ Cup Salted Butter (Room Temperature)
- *¼ Teaspoon Salt (If using unsalted butter)
- ½ Teaspoon Peanut Butter (Smooth kind)
- ¼ Cup Pumpkin Purée (Canned.Not pumpkin pie filling)
- ¼ Teaspoon Baking Soda
- 1 Egg (Small size)
- 1 ½ Teaspoon Pure Vanilla Extract
- ½ Cup Reese’s Pieces Chocolate (Extra for topping-optional)
- ½ Cup White Chocolate Chips (Extra for topping-optional)
Instructions:
- In a stand mixer bowl or mixing bowl, add the salted butter, light brown sugar, granulated white sugar, and vanilla extract. Mix until just combined, scraping the sides with a spatula once in a while
- Stop the mixer and add the egg, pumpkin purée, and peanut butter. Continue mixing until just combined.
- Stop the mixer again, and add the flour, baking soda, unsweetened cocoa powder, and salt (if using unsalted butter). Mix until just combined, being careful not to overmix the dough. Scrape the sides with a spatula once in a while to ensure everything is well combined.
- Remove the bowl from the stand mixer and place it on your work surface. Add the white chocolate chips and Reese’s chocolate to the dough. Fold the chocolates into the dough with a spatula until evenly distributed.
- Transfer the dough to an airtight container or wrap it in cling wrap, and chill it in the fridge overnight.
- On the day of baking,preheat the oven to 340°F and take out the dough from the fridge. Transfer the overnight chilled dough to your work station.
- Prepare a baking sheet lined with parchment paper or a Silpat. Roll the cookie dough into balls of your desired size—there are no restrictions on how big or small you want them. We use a baking measuring spoon, scooping 1 ½ tablespoons of cookie dough per ball, but feel free to adjust the size to your liking.
- After rolling the dough into balls, slightly press them down with your palm to flatten them a bit. You can press some Reese’s pieces & white chocolate chips on top, though this is optional.
- Bake the cookies for 10 to 12 minutes at 340°F, or until they are lightly browned and set. The temperature and time are based on our oven and cookie size, so please adjust the time and temperature if necessary. Smaller or thinner cookies may take less time to bake, while thicker or larger cookies may need an extra minute. Adjust the baking time accordingly and use your own judgment.
- When the cookies are ready, remove the baking sheet from the oven. Let the cookies cool for at least 5 minutes on the baking sheet before transferring them to a cooling rack to cool completely.
- After 5 minutes, transfer the cookies to a cooling rack to cool completely before storing—or enjoy them right away!

*** © MB CREATIVE KITCHEN, 2022. No part of this site,, MBCREATIVEKITCHEN.COM may be reproduced in whole or in part in any manner without the permission of the copyright owner.
Tips & Notes:
- We chilled the dough overnight before baking it the next day.
- Chilling cookie dough overnight helps improve texture and flavor by allowing the fat to solidify, which prevents excessive spreading and creates a thicker, chewier cookie. It also gives the dough time to fully absorb the liquids and for the flavors to develop, resulting in a more flavorful cookie. Additionally, chilled dough is easier to handle and shape. We didn’t use any extra flour when shaping the dough.
- These cookies are soft and chewy on the inside, with a crisp outside.
- We used salted butter, but you are free to use unsalted butter—just add the salt as stated above.
- We used Kraft’s smooth peanut butter, but you can use your favorite brand.
- We used store-bought canned pumpkin purée, but you are welcome to make your own.
- As shown by the final cookie results, the recipe has been tested with the ingredients and amounts listed above. If you want to make any changes, feel free to experiment, but please remember to do so at your own risk, as we have not tested those variations. Since everyone has their own taste buds when it comes to food, if you like your cookies sweeter, just add extra sugar.
- As mentioned, we measured our cookie size with a baking measuring spoon. The baking temperature and duration are based on our cookie size and oven. You may need to adjust both the temperature and baking time, as every oven can differ. The duration will also depend on the size and thickness of your cookies. Please adjust accordingly.
- You can find Reese’s pieces chocolate at most major grocery stores, candy stores, or online.
- The cookies can be stored at room temperature for up to one week, in the fridge for up to two weeks, or in the freezer for up to a month if stored and sealed properly.
- You can prepare the dough ahead of time and keep it in the fridge for up to a week before baking, or in the freezer for up to two months if stored and sealed properly. Just take the dough out of the freezer and thaw it in the fridge the day before baking.
- We garnished the cookies with additional Reese’s Pieces and white chocolate chips on top after shaping them, but this is completely optional.