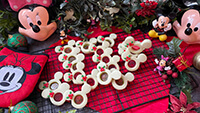
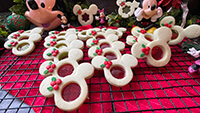
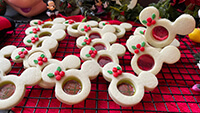
Christmas Mistletoe Stained Glass Cookies

These adorable and delicious holiday cookies with a Christmas theme are one of our favourites during the holiday season. They are made with green and red crushed hard candy, which resembles stained glass in the centre. You can use any of your favourite flavours of fruity hard candy. Whether it be grapes, strawberries, green apples, cherries, or lemons, now you can enjoy yummy fruity candy and crispy cookies at the same time.
Ingredients:
- 2 Cups All-Purpose Flour
- 1/4 Cup Cornstarch
- 1/4 Teaspoon Salt
- 1/2 Cup Unsalted Butter (room temperature)
- 3/4 Cup Granulated White Sugar
- 1 Teaspoon Vanilla Extract
- 1/8 Teaspoon Almond Extract (optional)
- 1 Large Egg (room temperature,lightly beaten with a fork)
- 1/8 Teaspoon Baking Powder
- 10-20 hard candies of your choice
- Green Edible Food Coloring Gel
- Some Baking Sprinkles + Royal Icing (optional)
Instructions:
- In a mixing bowl, add flour, cornstarch, salt and baking powder. Whisk them up and set them aside.
- In a stand mixer bowl or mixing bowl if you are using a hand mixer, add butter and sugar.
- Beat the mixture with a paddle attachment until smooth, roughly about 2 minutes on medium low to medium high. Make sure to stop the mixer once in a while to scrape down the sides.
- When the mixture comes together, you may add in the egg, a drop of green edible food coloring gel, vanilla extract, and almond extract (optional).
- Continue to mix on high until well combined. Stop the mixer and add in the flour mixture. Mix on low for a minute before gradually increasing the speed to high. Mix until well combined.
- Keep the dough in a ziplock bag or airtight container and store the dough in the fridge for at least 2 hours, preferably overnight in the fridge, or until you are ready to bake them. You can make the dough ahead of time and store it in the freezer for up to 4 weeks until you are ready to bake them.
- On the day of your baking, take the dough out of the fridge and let the chilled dough sit out at room temperature for 20 minutes or so. If it's overnight dough, it might take 25 minutes or more, especially during the winter months. Use your judgment here.
- Preheat the oven to 340°F.
- Remove the candy wrapper and crush the hard candy with a rolling pin (or with anything you can think of) into a coarse texture. Set aside.
- Transfer the dough to your work area, but before that, lightly dust your work surface and rolling pin with some flour.
- Roll the dough to your desired thickness and cut out the shape with a cookie cutter.
- Transfer the cut dough to a baking sheet lined with parchment paper or a silicone baking mat. Use a small round cookie cutter and cut out the middle of the cookie dough.
- With a small teaspoon, fill the cut out of each cookie with some crushed hard candy that we prepared earlier.
- Repeat the process.
- Bake the cookies at 320 degrees F for 12–15 minutes, or until the edges of the cookies are slightly brown and the crushed candy has melted. **All ovens work differently, so please adjust the temperature and time accordingly. Add extra minutes if needed.
- Leave the baked cookies on the baking sheet for 6-10 minutes, or until the crushed candy has set. Do not try to remove them early.
- Right now, you can decorate the cookies with some baking sprinkle decorations. Use thin royal icing as adhesive. Of course, you may skip this decorating part if you want.
- Transfer the cookies to a wire rack to cool completely before storing them in an airtight container.
- If you want to store the cookies for longer, keep them in the fridge. They are still good for 2 weeks in the fridge.
*** © MB CREATIVE KITCHEN, 2022. No part of this site,, MBCREATIVEKITCHEN.COM may be reproduced in whole or in part in any manner without the permission of the copyright owner.
Video
Tips & Notes:
- Please keep in mind that the temperature setting and time recommendations above are based on our oven. All ovens work differently. Please adjust the temperature setting of your oven accordingly.
- You may use unsalted or salted butter. If using salted butter, omit the salt in the recipe.
- You can replace regular butter with margarine or lactose-free butter.
- We used all-purpose flour, and we have not tried or experimented with other types of flour. You are welcome to experiment if you prefer.
- Double the recipe if you want to bake a big batch.
- The cookie dough can be prepared ahead of time.
- You can store the cookie dough in the freezer for up to 4 weeks in a ziploc bag.
- We bought the baking decorative sprinkles at our local baking supply store.
- For hard candy, you can use Lifesavers, Jolly Ranchers, Nestle Fox's Crystal Clear Fruits Flavored Hard Candy, etc.
- Almond extract is optional. You can just use vanilla extract alone. In this case, 1 teaspoon plus 1/8 teaspoon of vanilla extract if almond extract is omitted.


