
Kabocha Squash Curry Potato Buns
(Vegetarian Curry Potato Buns)
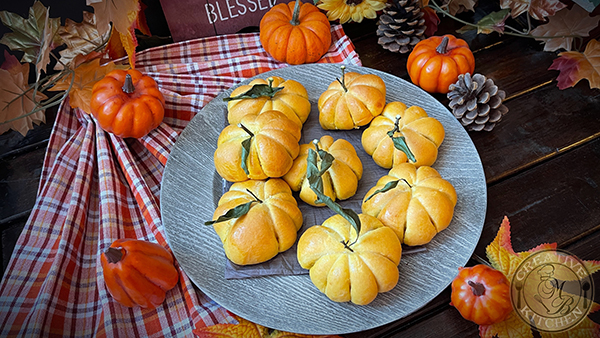
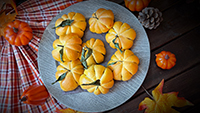
The time has come to introduce yourself to "Kabocha," a delicious Japanese squash with a flavour that is a sweet mix of sweet potato and pumpkin. If you enjoy savoury buns, you must try this curry potato bun. The flavorful curry potato filling is stuffed inside these soft, sweet and fluffy buns made with kabocha squash. These tasty vegetarian buns are ideal for breakfast, lunch, or a snack.
“A” Ingredients for the buns:
- 2 Cup Robin Hood Bread Flour
- ¼ Cup Mashed Kabocha Squash
- 4 Tablespoons Butter (room temperature)
- 1 ½ Tablespoons Sugar
- 1 Teaspoon Bread Machine Yeast/Instant Yeast
- 150 ml Milk (chilled from the fridge)
- 1 Egg White (room temperature)
- ½ Teaspoon Salt
“B” Ingredients for the fillings - Curry Potato:
- 2 Medium Size Yellow Potatoes
- 3 Tablespoons Chopped White/Yellow Onions
- 1/4 Teaspoon Minced Garlic
- ⅛ Cup Water
- 1-2 Stalks Curry Leaves
- 2 Tablespoons Red/Yellow Curry Powder (or paste)
- ½ Tablespoon Granulated White Sugar
- 2 Tablespoons Cooking Oil
- Salt & White Pepper (to taste)
“C” Ingredients for shaping
- A few food grade twine for tying the buns
- 3 Tablespoons Cooking Oil
“D” For egg wash:
- 1 Egg Yolk
- 1 Tablespoon of milk
Instructions:
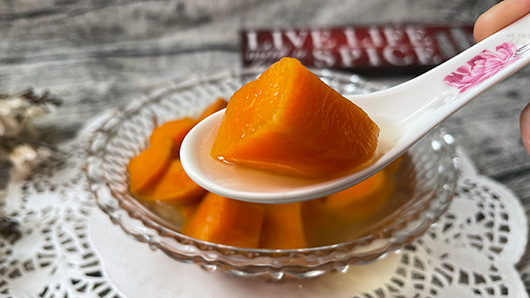
- Prepare to steam kabocha squash. First, peel and cut the kabocha squash into cubes. 1/8 cup of mashed kabocha squash is required. Steamed 1/4-1/2 cup kabocha squash cubes until softened
- Remove it from the steamer and mash it up while it is still warm. Set aside for 3 minutes before using it in the bread machine.
- Prepare the bread dough. Add ingredients"A" into the bread machine bucket except the butter according to your bread machine setting. In our case, we add the wet ingredients first, then the dry ingredients.
- Turn the bread machine to the "Dough" setting and let the bread machine do the rest.
- Roughly about 5-6 minutes of kneading in the machine, open the bread machine lid and add in the butter. Close the lid and let the machine continue with the dough kneading process.
- While waiting for the dough, let’s prepare the fillings.
- Prepare the fillings. Peel off the potato skin and cut them into small cubes as shown.
- Soak the cubed potatoes in a bowl filled with room-temperature water and set aside.
- Roughly chop up white or yellow onions and set aside.
- Peel and mince up fresh garlic. If fresh garlic is not available, you can use garlic powder.
- Back to the cubed/soaked potatoes. Carefully drain off the water. Rinse it a few times with tap water. Set aside after patting dry with a paper towel.
- Stir fry the fillings. Heat up two tablespoons of cooking oil in a pan or skillet at medium heat.
- Add in garlic and onion. Stir fry for a minute and add in all the potato cubes.
- Add curry powder or curry paste, water, white pepper, curry leaves, and stir fry until well combined.
- Turn the heat down to medium low and let it simmer until the potatoes are tender and the liquid has dried up, stir occasionally. Test the doneness with a fork.
- Add salt to taste. Remove it from the stove and set it aside to cool completely before using it.
- See the end result of the curry potato as shown. The fillings should be dried and not wet.
- Prepare the twine. Cut a long piece of food grade twine and soak them in cooking oil. You need 4 twines for each dough ball. Set it aside.
- Shaping the dough. When the dough is ready, remove the dough to your work area.
- Lightly dust the surface with some bread flour.
- Push down the dough to release air.
- Roll, divide, and shape each dough ball into 8-10 small dough balls, depending on the size of the bun you want.
- Depending on how many dough balls you can make from this batch of dough, divide the curry potato fillings evenly with the buns on a plate.
- Back to the dough balls. Flatten each dough ball edge with a rolling pin or your palm.
- Add the curry potato fillings in the middle or the dough.
- Pull the dough edges over the fillings and seal it up as shown.
- Place each shaped dough ball on the double crisscross twine as shown in the video, tie the ends of each twine in a knot, and cut off the excess twine. Repeat the same process with the rest of the dough balls.
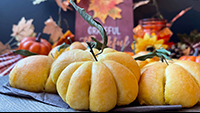
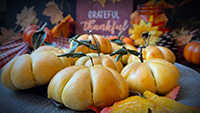
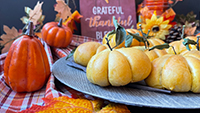
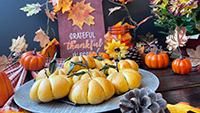
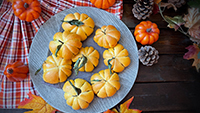
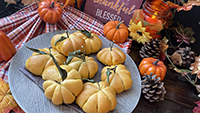
- Place the pumpkin-shaped bun on a baking sheet. Remember to space apart the buns as it will rise in the oven.
- Cover the pumpkin buns with cling wrap/tea towel/etc and set aside for 30-40 minutes to rise in a warm area.
- Egg Wash. Add the egg yolk that we set aside earlier in a small bowl and mix the yolk with milk. Set aside after thoroughly mixing.
- Preheat the oven to 300 F 20 minutes before the proofing time is up.
- Baking the pumpkin buns. Before the pumpkin bun goes into the oven, lightly brush the surface of the buns with egg wash with a brush.
- Bake for 20–25 minutes at 320°F, or until golden brown. Each oven works differently. Please adjust the temperature setting accordingly.
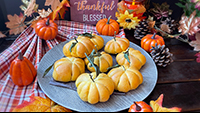
- Remove the pumpkin buns and let them cool on a wire rack for at least 3 minutes.
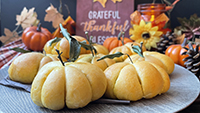
- Cut the knot off with scissors once they're warm enough to handle. Remove the twine out carefully.
- Optional-In each pumpkin bun, place a clove/pretzel stick/pumpkin seed or anything that you can think of in place of the stem.
*** © MB CREATIVE KITCHEN, 2022. No part of this site,, MBCREATIVEKITCHEN.COM may be reproduced in whole or in part in any manner without the permission of the copyright owner.
Video
Tips & Notes:
- Soak the cubed potato in a bowl filled with room temperature water while you prepare the rest of the filling ingredients. The reason we soak cubed potatoes in water is to remove excess starch.
- If Kabocha squash is not available, you can replace it with regular pumpkin.
- If you prefer to knead the dough with your hands, you are welcome to do so.
- If you prefer to knead the dough with your stand mixer, feel free to do so.
- If the dough is too wet, dust a little bit of bread flour on your hands and work area but not too much. Keep on kneading and it will become less sticky. Each type and brand of flour absorbs a different amount of water.
- You can use white potatoes other than yellow potatoes.
- You can use white, yellow, or red onions. Your choice.
- As for curry powder, you can use curry paste as well.
- Red or yellow curry of your choice. Either one is fine.
- Adjust the salt and pepper for the fillings according to your taste buds.
- Please keep in mind that the temperature setting/time recommendations above are based on our oven. All ovens work differently. Please adjust the temperature setting of your oven accordingly.
- Bread dough may take longer to rise in cold weather. Therefore, add more time for it to rise if needed.